Showing posts with label Tutorial. Show all posts

Thursday, July 2, 2015

The Best Chocolate Cake Recipe (Low Fat)


Well..it seems ages since I have been here.
 
Some technical issues with blogger. I was unable to post pictures onto blogger and i admit.. i didn’t bother much to go digging into it. Anyways..its back to working now. Fotos are getting uploaded and finally...this space gets some fresh air after a long break. All this while...most of my posts got reduced to mini ones directly onto my fb page. I am still getting kindof bugged up putting up this post, coz the formatting just wouldnt save. The fonds keep changing size and type even though they look just fine in the preview... :/
 
But I have to post this today....coz...
 
..today is someones birthday ! And i used to keep telling her, i would drop by her blog but always missed it out. So.,.this is for her... one of the best human neign i have ever come across from this blogpshere..a terribly witty lady...Amelia, of Amelia’s Dessert.
Happy Birthday sweetheart..this is for you!!!
 
An easy, foolproof chocolate cake which is moist with a fudgy texture and will keep well for 4-5 days.


To all Chocolate Cake freaks..trust me blindly..this IS a KEEPER !  As simple as baking a store brought cake mix pack..where you add some oil and egg to the packed dry mix. Here, you just prepare that dry mix, add some liquids , mix ...bake. And the best part is..itis definitely Low in Cals. The liquid content is just plain hot water (or hot coffee), low fat milk , plus some oil. No Butter !
 
But just few things to share before moving to the recipe.
 
I would strongly recommend, if using Panasonic Dimension 4 oven..KEEP THE TEMPERATURE TO 160 deg C. Cakes are always to be baked at 180 deg C, but in this brand...those baked at 180 never give a good output. Made be coz of the power setting of the oven..but from trial and error, i have noticed that in this particular brand of oven..cakes are best when done at 160 )
 
This recipe gives quite a lot of batter, especially as it is of a runny texture. You can make two 9” round cakes . I could easy get one 9” bundt cake, about a dozen mini doughnut sized ones (baked it in a doughnut maker tray) and a dozen mini cupcakes.


Ingredients
For the cake
·         1 ¾ cup plain flour
·         2 cup caster sugar
·         ¾ cup cocoa powder
·         1½ tsp baking powder
·         1½ tsp bicarbonate of soda
·         1 tsp salt
·         2 eggs
·         1  cup low fat milk
·         ½ cup vegetable oil
·         2 tsp vanilla extract
·         1 cup hot water / hot coffee


Preparation method
 
Preheat the oven to 180C/350F/Gas 4. For me..it was 160 deg C, in my oven.
 
Grease the pans with some butter and dust with flour. Set aside.
 
Add all the dry ingredients – flour, sugar, cocoa powder, baking soda, baking powder, salt into a   bowl and mix well with a wooden spoon till well combined. (I did sieve it once just not to take chance.)
Now break in the 2 eggs, pour the milk, oil and mix with an electric beater for atleast 2 minutes till combined. The batter would be really thick at this stage.
 
 
 Add the vanilla essence,  hot water/hot coffee to the mixture, a little at a time. (The cake mixture will now be very liquid.) Beat again on medium for a minute or two till until smooth.
 
Divide the cake batter between the tins and bake in the oven for 35 minutes, or until the top is firm to the touch and a skewer inserted into the centre of the cake comes out clean.


For me at 160 , it was done in 35 minutes. At 180 deg, maybe about 30 mins would do.


Remove the cakes from the oven and allow to cool completely, still in their tins. I repeat..cool COMPLETELY...still in the tin. I was not patient enough for it to be fully cooled, and well..mine ended up half in the plate, half still in the pan while inserted. ;)
 
So much...for my impatience. :/ :/
 
To remove the cake, run a round-bladed knife around the inside of the cake tins to loosen the cakes. Carefully remove the cakes from the tins.


....very soft and fudgy  !!!

(God! i feel terrible seeign how my post looks. The texts in different size, shape, colour... eeks ! But I wanted to share this, and in a step-by-step way..so... kindly excuse. Sure..this recipe will make up for this crapness. I will put it on blogger again ) ;)


Monday, February 9, 2015

Tangy Grilled Fish Roast


"Meen pollichathu" is a trademark non-veg delicacy of us Keralites. I rekon how one of my friend, who is from Assam, visited Kerala last month and falling in looove with the dish.
 
This is not the exact way of preparation. The authentic means goes for frying the marinated fish and later steaming it wrapped in banana leaf. I have made it more user friendly, and of course, the better way - grilled it, rather than frying.


                                                          ...."gals"......hmmmm....

So, off to the recipe.....

For the marinade:
Chilly powder- 4 tbsp
Turmeric powder - 2 tbsp
Ginger- garlic paste - 1 tbsp
Tamarind pulp- 1-2 tbsp
Fennel powder- 1/2 tsp
Pepper powder - 1/2 tsp (optional)

For the masala gravy:
Onions chopped- 2 cup
Tomatoes - 1 medium
Green chilly - 2
Coriander leaves chopped- 2 springs
Coriander powder- 1 tbsp
Fenugreek powder- 1/2 tsp
Salt to taste


sadly..Mr. Frank and his friends...fell for these "gals" and now Resting in Peace on my counter top.
 
 
Cut and clean the fish and make diagonal slits on them. Make a paste with the ingredients listed under the "marinade" head .


 Marinate the fish and keep aside for ten minutes. 
 
 
Wrap in aluminum foil and grill for about 15 - 20 mins or almost done.


Meanwhile...in order to prepare the masala, heat oil in a pan and saute the chopped onions, tomatoes and all the remaining items in the "masala gravey" head.

 
Any marinade leftover from coating the fish can be added to the masala too.
 
 
                                              The fish would be done by now.


So, in the pan, move aside the sautes, carefully place the grilled fish and coat atop with the masala.
Cover and simmer on low heat for a few miutes, for the flavoures to penetrate the fish and be well coated.


                     Serve hot. Goes well with plain rice and a bowl of fresh veggie salad.

                                         __________________________________


Tuesday, November 4, 2014

Clab cleaning - a tutorial, and simple crab-stock soup


Crab meat is just ultimate !!..its tastes heavenly..but its all about getting there. To prepare it. I have had quite a few people telling me..that they love crab but not sure how to get started with it. So, decided to put something up on the very basics of Crab - from cleaning....storage..to a simple soup recipe.
 
Step 1 : Removing the Arpon
 
Usually, the crabs we get here would have its mandibles (the mouthparts at the front) removed . All the more better. Now, to what we call the APRON.
 
Flip the crab over. You'll see a triangular part on the underside near the rear of the crab That is the crab's abdomen .(called the APRON) with the excretory and reproductive organs, and you don't want to eat that  , so get your nails into the crack  and pry the abdomen open.


Inside,  see that there's many loosely attached white coloured things that don't look like meat. Those are the crab's gills, which are obviously not good for eating, so get them all off.

 
(Apron and the gills removed and cleaned)
 
Step 2 : Removing the Carapace
 
 
Chop off the last segments at the end of the legs (the crab foot/toe). You dont need those either. (left side image above)
 
Carapace is the back of the crab,and we remove it by sticking our thumb into the hole left from removing the apron and lifting up firmly. The shell will detach from the body with some guts attached. Remove and discard the leaf-like, spongy gills from either side of the body. Rinse out the greenish-brown guts (image on the right hand side above, with the carapace removed)
 
Step 3 : Seperate the legs and the claws


Now twist the leg at the joints to break it into parts.
 
and the next is to cut the body into half, at the centre, halfwise.


Rip off the smallaer claws. U keep it. Wash all the cut parts thoroughly in running water.
 
 
 that the cleaning part is done..you are literally, more than half way through the process....phew !
 
 
A L M O S T   D O N E  !!!
 
 
now to the stove top part. Always have seen my mummy do this - with crab and prawns, as well.

 
 Cook them in enough water with salt and pepper .


  Drain the stock and keep the cooked meat for future use.
 
And  what ended up of the stock was a quick simple soup. Basically, its just some veggies and noodles added into it.


Into a wok, goes a tbsp or two of olive oil.
Saute some garlic, fine julian cut carrot, sweet corn, cooked noodles (which i had beforehand-some lefotver, to be honest).
Once the carrtos are tender, add in the stock.


I didnt go for much additives, as i wanted the crab flavour to stay. Some hot and spiced vinegar, pepper powder and salt. Thats all that went it.


Mix some corn flour in water and add to the boiling soup, stirring well..to thicken.

 
Serve hott !
 
 Egg, chicken, cabbage, soya sauce... anything could go in. Feel free...


Tuesday, October 14, 2014

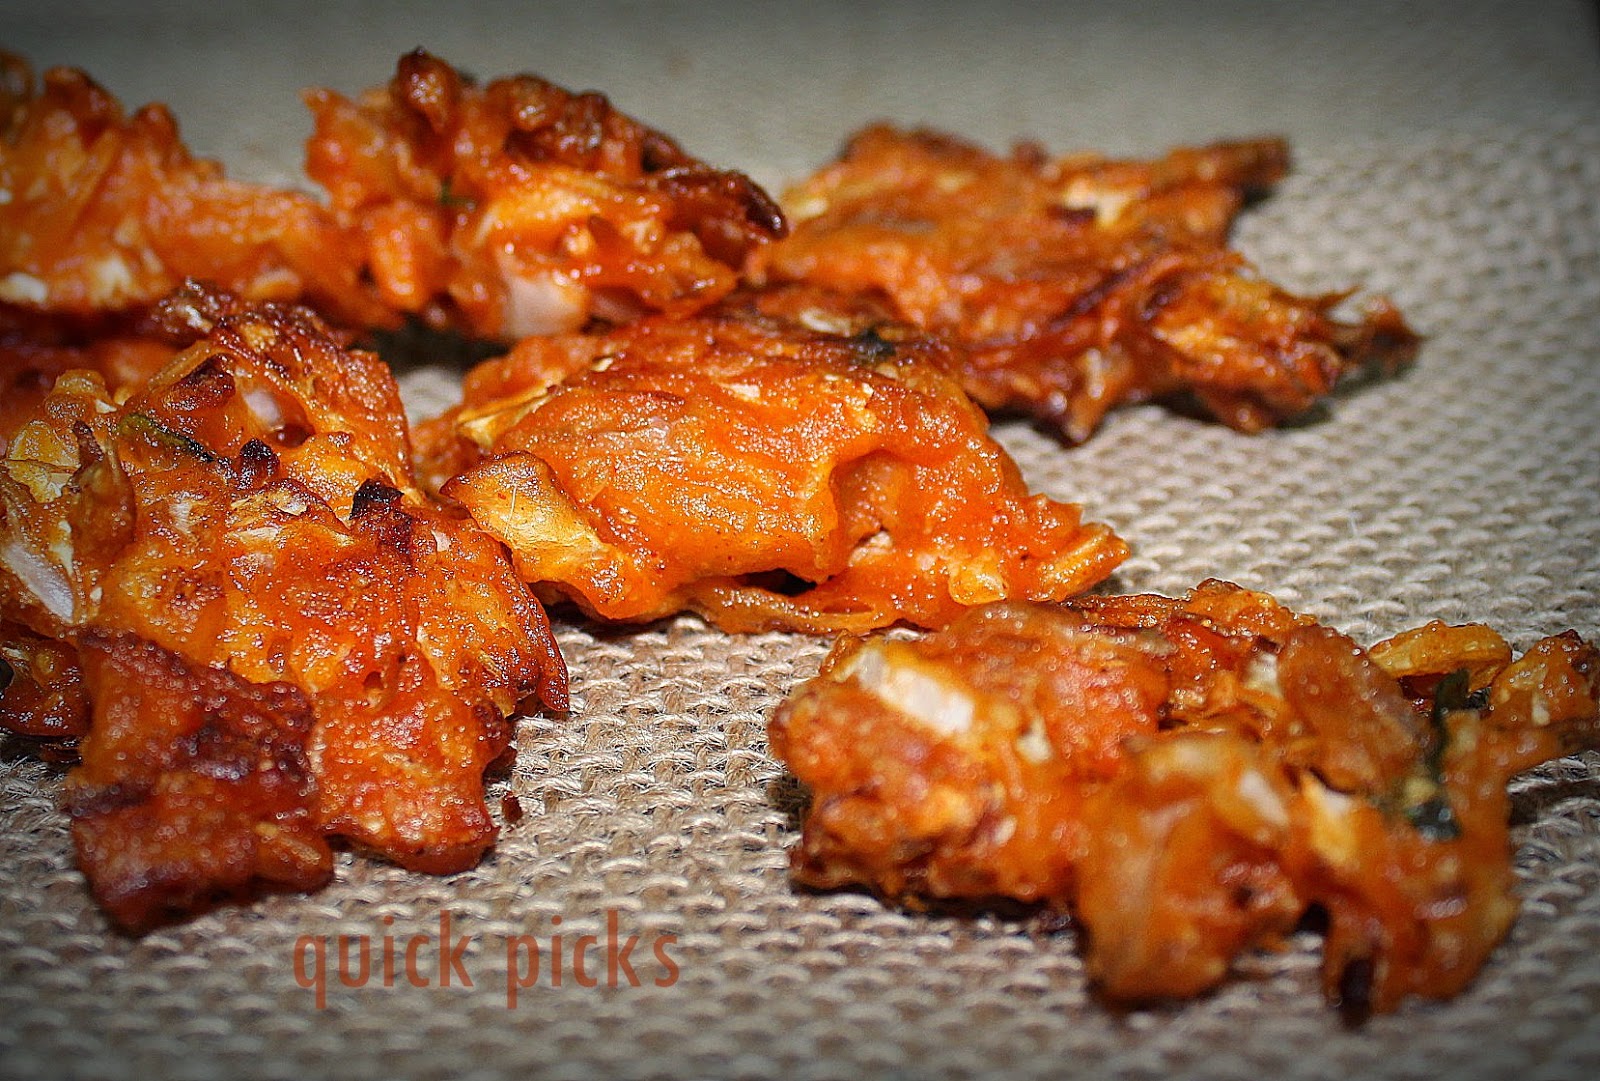
Oats Cookery Workshop Part 5 :Recipe No: 7 - Cabbage Oats Pakoda


In continuation to the last four posts - on the Oats Cookery Workshop Demo -
Recipe 7 of 8 - Oats - Cabbage Pakoda
Oats Type Used - Regular Quick Cooking
Recipe Type - Snack


Ingredients:

Cabbage 1/4 no (Chopped lengthwise)
Onion - 2 no (Sliced lengthwise)
Oats – 4-5 tbsp
Kadalai Maav/Chickpea flour/Besan -  6 tbsp
Corn flour - 3 tbsp
Red chilli powder - (As per your taste)
Curry leaves - few
Salt
Water to sprinkle
Oil for deep frying
 
Method:
 

In a wide bowl, put cabbage, onion, oats and slight mix.


Add all other ingredients and sprinkle little water and mix well. It should not be watery.

Heat oil in a kadai/wok. When its hot, deep fry till brown both sides and take out on tissue to remove excess oil.


The ladies preparing the pakodas

 
Paired it with a dip of sweet-chillie-sauce mixed with mayonnaise.


This was the most liked of all...they are very crispy and need be served hot!


Oats Cookery Workshop Part 4 : Recipe No 6 - Oats-Green Peas Tikkis

In continuation to the last three posts - on the Oats Cookery Workshop Demo -
 
Recipe 6 of 8 - Green Peas Oats Tikkis.
Oats Type Used - Quick Cooking
Recipe Type - Snack
 

Ingredients :
 
Green Peas : 1 can
Oats – 1 cup
Onion - 1 (chopped into small pieces)
Ginger - 1 small wedge
Green Chilly - 2-3 nos
Coriander leaves - a hand full
Salt - as reqd

Method:


Drain the canned green peas off the water.    


Crush the green chilies and ginger first, then mix it with the green peas and oats.

 
Give one spin in the blender just to coarsely grind the peas and oats. But this is optional..you can make the tikkis without grinding too.
Add the coriander leaves and chopped onion to the mix.
 
 
 Make small vada shapes and deep fry.


For a change, we tried a small batch dipped in beaten egg before frying. The cutlet effect ;)

 
The ladies preparing the tikkis.

 
Thats it there, on the right, served with some hummus. Yeah...it might sound wierd, but paired it so, out of some instinct.


Click on the links below to go back to the previous posts


Showing posts with label Tutorial. Show all posts

Thursday, July 2, 2015

The Best Chocolate Cake Recipe (Low Fat)


Well..it seems ages since I have been here.
 
Some technical issues with blogger. I was unable to post pictures onto blogger and i admit.. i didn’t bother much to go digging into it. Anyways..its back to working now. Fotos are getting uploaded and finally...this space gets some fresh air after a long break. All this while...most of my posts got reduced to mini ones directly onto my fb page. I am still getting kindof bugged up putting up this post, coz the formatting just wouldnt save. The fonds keep changing size and type even though they look just fine in the preview... :/
 
But I have to post this today....coz...
 
..today is someones birthday ! And i used to keep telling her, i would drop by her blog but always missed it out. So.,.this is for her... one of the best human neign i have ever come across from this blogpshere..a terribly witty lady...Amelia, of Amelia’s Dessert.
Happy Birthday sweetheart..this is for you!!!
 
An easy, foolproof chocolate cake which is moist with a fudgy texture and will keep well for 4-5 days.


To all Chocolate Cake freaks..trust me blindly..this IS a KEEPER !  As simple as baking a store brought cake mix pack..where you add some oil and egg to the packed dry mix. Here, you just prepare that dry mix, add some liquids , mix ...bake. And the best part is..itis definitely Low in Cals. The liquid content is just plain hot water (or hot coffee), low fat milk , plus some oil. No Butter !
 
But just few things to share before moving to the recipe.
 
I would strongly recommend, if using Panasonic Dimension 4 oven..KEEP THE TEMPERATURE TO 160 deg C. Cakes are always to be baked at 180 deg C, but in this brand...those baked at 180 never give a good output. Made be coz of the power setting of the oven..but from trial and error, i have noticed that in this particular brand of oven..cakes are best when done at 160 )
 
This recipe gives quite a lot of batter, especially as it is of a runny texture. You can make two 9” round cakes . I could easy get one 9” bundt cake, about a dozen mini doughnut sized ones (baked it in a doughnut maker tray) and a dozen mini cupcakes.


Ingredients
For the cake
·         1 ¾ cup plain flour
·         2 cup caster sugar
·         ¾ cup cocoa powder
·         1½ tsp baking powder
·         1½ tsp bicarbonate of soda
·         1 tsp salt
·         2 eggs
·         1  cup low fat milk
·         ½ cup vegetable oil
·         2 tsp vanilla extract
·         1 cup hot water / hot coffee


Preparation method
 
Preheat the oven to 180C/350F/Gas 4. For me..it was 160 deg C, in my oven.
 
Grease the pans with some butter and dust with flour. Set aside.
 
Add all the dry ingredients – flour, sugar, cocoa powder, baking soda, baking powder, salt into a   bowl and mix well with a wooden spoon till well combined. (I did sieve it once just not to take chance.)
Now break in the 2 eggs, pour the milk, oil and mix with an electric beater for atleast 2 minutes till combined. The batter would be really thick at this stage.
 
 
 Add the vanilla essence,  hot water/hot coffee to the mixture, a little at a time. (The cake mixture will now be very liquid.) Beat again on medium for a minute or two till until smooth.
 
Divide the cake batter between the tins and bake in the oven for 35 minutes, or until the top is firm to the touch and a skewer inserted into the centre of the cake comes out clean.


For me at 160 , it was done in 35 minutes. At 180 deg, maybe about 30 mins would do.


Remove the cakes from the oven and allow to cool completely, still in their tins. I repeat..cool COMPLETELY...still in the tin. I was not patient enough for it to be fully cooled, and well..mine ended up half in the plate, half still in the pan while inserted. ;)
 
So much...for my impatience. :/ :/
 
To remove the cake, run a round-bladed knife around the inside of the cake tins to loosen the cakes. Carefully remove the cakes from the tins.


....very soft and fudgy  !!!

(God! i feel terrible seeign how my post looks. The texts in different size, shape, colour... eeks ! But I wanted to share this, and in a step-by-step way..so... kindly excuse. Sure..this recipe will make up for this crapness. I will put it on blogger again ) ;)


Monday, February 9, 2015

Tangy Grilled Fish Roast


"Meen pollichathu" is a trademark non-veg delicacy of us Keralites. I rekon how one of my friend, who is from Assam, visited Kerala last month and falling in looove with the dish.
 
This is not the exact way of preparation. The authentic means goes for frying the marinated fish and later steaming it wrapped in banana leaf. I have made it more user friendly, and of course, the better way - grilled it, rather than frying.


                                                          ...."gals"......hmmmm....

So, off to the recipe.....

For the marinade:
Chilly powder- 4 tbsp
Turmeric powder - 2 tbsp
Ginger- garlic paste - 1 tbsp
Tamarind pulp- 1-2 tbsp
Fennel powder- 1/2 tsp
Pepper powder - 1/2 tsp (optional)

For the masala gravy:
Onions chopped- 2 cup
Tomatoes - 1 medium
Green chilly - 2
Coriander leaves chopped- 2 springs
Coriander powder- 1 tbsp
Fenugreek powder- 1/2 tsp
Salt to taste


sadly..Mr. Frank and his friends...fell for these "gals" and now Resting in Peace on my counter top.
 
 
Cut and clean the fish and make diagonal slits on them. Make a paste with the ingredients listed under the "marinade" head .


 Marinate the fish and keep aside for ten minutes. 
 
 
Wrap in aluminum foil and grill for about 15 - 20 mins or almost done.


Meanwhile...in order to prepare the masala, heat oil in a pan and saute the chopped onions, tomatoes and all the remaining items in the "masala gravey" head.

 
Any marinade leftover from coating the fish can be added to the masala too.
 
 
                                              The fish would be done by now.


So, in the pan, move aside the sautes, carefully place the grilled fish and coat atop with the masala.
Cover and simmer on low heat for a few miutes, for the flavoures to penetrate the fish and be well coated.


                     Serve hot. Goes well with plain rice and a bowl of fresh veggie salad.

                                         __________________________________


Tuesday, November 4, 2014

Clab cleaning - a tutorial, and simple crab-stock soup


Crab meat is just ultimate !!..its tastes heavenly..but its all about getting there. To prepare it. I have had quite a few people telling me..that they love crab but not sure how to get started with it. So, decided to put something up on the very basics of Crab - from cleaning....storage..to a simple soup recipe.
 
Step 1 : Removing the Arpon
 
Usually, the crabs we get here would have its mandibles (the mouthparts at the front) removed . All the more better. Now, to what we call the APRON.
 
Flip the crab over. You'll see a triangular part on the underside near the rear of the crab That is the crab's abdomen .(called the APRON) with the excretory and reproductive organs, and you don't want to eat that  , so get your nails into the crack  and pry the abdomen open.


Inside,  see that there's many loosely attached white coloured things that don't look like meat. Those are the crab's gills, which are obviously not good for eating, so get them all off.

 
(Apron and the gills removed and cleaned)
 
Step 2 : Removing the Carapace
 
 
Chop off the last segments at the end of the legs (the crab foot/toe). You dont need those either. (left side image above)
 
Carapace is the back of the crab,and we remove it by sticking our thumb into the hole left from removing the apron and lifting up firmly. The shell will detach from the body with some guts attached. Remove and discard the leaf-like, spongy gills from either side of the body. Rinse out the greenish-brown guts (image on the right hand side above, with the carapace removed)
 
Step 3 : Seperate the legs and the claws


Now twist the leg at the joints to break it into parts.
 
and the next is to cut the body into half, at the centre, halfwise.


Rip off the smallaer claws. U keep it. Wash all the cut parts thoroughly in running water.
 
 
 that the cleaning part is done..you are literally, more than half way through the process....phew !
 
 
A L M O S T   D O N E  !!!
 
 
now to the stove top part. Always have seen my mummy do this - with crab and prawns, as well.

 
 Cook them in enough water with salt and pepper .


  Drain the stock and keep the cooked meat for future use.
 
And  what ended up of the stock was a quick simple soup. Basically, its just some veggies and noodles added into it.


Into a wok, goes a tbsp or two of olive oil.
Saute some garlic, fine julian cut carrot, sweet corn, cooked noodles (which i had beforehand-some lefotver, to be honest).
Once the carrtos are tender, add in the stock.


I didnt go for much additives, as i wanted the crab flavour to stay. Some hot and spiced vinegar, pepper powder and salt. Thats all that went it.


Mix some corn flour in water and add to the boiling soup, stirring well..to thicken.

 
Serve hott !
 
 Egg, chicken, cabbage, soya sauce... anything could go in. Feel free...


Tuesday, October 14, 2014

Oats Cookery Workshop Part 5 :Recipe No: 7 - Cabbage Oats Pakoda


In continuation to the last four posts - on the Oats Cookery Workshop Demo -
Recipe 7 of 8 - Oats - Cabbage Pakoda
Oats Type Used - Regular Quick Cooking
Recipe Type - Snack


Ingredients:

Cabbage 1/4 no (Chopped lengthwise)
Onion - 2 no (Sliced lengthwise)
Oats – 4-5 tbsp
Kadalai Maav/Chickpea flour/Besan -  6 tbsp
Corn flour - 3 tbsp
Red chilli powder - (As per your taste)
Curry leaves - few
Salt
Water to sprinkle
Oil for deep frying
 
Method:
 

In a wide bowl, put cabbage, onion, oats and slight mix.


Add all other ingredients and sprinkle little water and mix well. It should not be watery.

Heat oil in a kadai/wok. When its hot, deep fry till brown both sides and take out on tissue to remove excess oil.


The ladies preparing the pakodas

 
Paired it with a dip of sweet-chillie-sauce mixed with mayonnaise.


This was the most liked of all...they are very crispy and need be served hot!


Oats Cookery Workshop Part 4 : Recipe No 6 - Oats-Green Peas Tikkis

In continuation to the last three posts - on the Oats Cookery Workshop Demo -
 
Recipe 6 of 8 - Green Peas Oats Tikkis.
Oats Type Used - Quick Cooking
Recipe Type - Snack
 

Ingredients :
 
Green Peas : 1 can
Oats – 1 cup
Onion - 1 (chopped into small pieces)
Ginger - 1 small wedge
Green Chilly - 2-3 nos
Coriander leaves - a hand full
Salt - as reqd

Method:


Drain the canned green peas off the water.    


Crush the green chilies and ginger first, then mix it with the green peas and oats.

 
Give one spin in the blender just to coarsely grind the peas and oats. But this is optional..you can make the tikkis without grinding too.
Add the coriander leaves and chopped onion to the mix.
 
 
 Make small vada shapes and deep fry.


For a change, we tried a small batch dipped in beaten egg before frying. The cutlet effect ;)

 
The ladies preparing the tikkis.

 
Thats it there, on the right, served with some hummus. Yeah...it might sound wierd, but paired it so, out of some instinct.


Click on the links below to go back to the previous posts