Showing posts with label Rice. Show all posts

Wednesday, September 10, 2014

Pachoru - a Keralite Christian offering

For Catholic Christians, September 8 marks the Feast of Mother Mary, or Nativity of Mother Mary, believed to be Her birthday. 
 
 
The winegrowers in France called this feast "Our Lady of the Grape Harvest". The best grapes are brought to the local church to be blessed and then some bunches are attached to hands of the statue of Mary. A festive meal which includes the new grapes is part of this day.
 
In Kerala, meanwhile, most churches would give "THIS" as an offering to the devoties , after the Church Service. Traditionally, known as "pachoru" in Malayalam it's raw rice cooked in coconut milk and served with jaggery syrup.


Ingredients

Raw rice - 1 and 1/2 cup

Thick coconut milk - 1/2 - 1 cup

Thin coconut milk - 5 cup

Cumin seeds - 1/2 tsp

Salt as needed

Jaggery as needed
 
Preparation
 
Pressure cook raw rice along with 5 cups of thin coconut milk, salt and cumin seeds till 2 whistles.

When the pressure is released, add thick coconut milk to the cooked rice. Boil it. Switch off the stove.

Grease a plate and pour the cooked
rice to this and flatten it, keep it for sometime, so that you can cut it into the desired shapes.
 
Pachoru is ready to be served with jaggery syrup .
 
How to prepare jaggery syrup

Boil jaggery with some water on low flame till it melts completely to forms the syrup. Cool and strain before using.


Now, hope over to my Pick Quicks blog if you would  like to have a peep into OUR Parish Church Feast back home in Kerala, The Thykoodam St. Raphael's Churuch, and not to miss, the best of the most " in"music band at the moment..."The Thaikoodam Bridge".
 
 
The link "here"


Recipe source - a dear co-blogger friend Beena . Here blog in the link here


Wednesday, June 12, 2013

The mast mast DUM...for biriyanis.

We had been having guests come over during the last few weekends in a row now..and ask my husband about the menu, he is like..." biriyani and the brinjal chuntey (that will come sometime later).....stays. Rest, up to you." Coz, this was something that his wifey gets really appreciated for.
.
 

Well, yes...think i can do this right, by now. Have been making this "well appreciated" biriyani for years..but....have never made an attempt to write about it on my blog. Not that i keep secrets and don't want to reveal any hidden ingredients ..no...nothing like that. Trust me, to all honestly, its just that.. i don't have any standard recipe. Sachee ! I just go by the instincts. Yet..yet..yes, there are certain "never miss" steps that i very strictly adhear to. And that, is definitely getting shared here.

 
(By the way, for a person who is very new to this really flavourful,  Indian one pot meal called "The Biriyani", this post will be very incomplete. I am not going in for the detailed cooking and recipe in here...coz, as I said, i don't stick to one ..neither do i use any standard masala powder (whatever is available at that moment, goes in)..but don't you worry. I can always refer you to this particular blog site which i really really liked, during my first attempt in food blogging, about 5 years back. She was a very active blogger then. Her writeups were very detailed, i enjoyed reading her posts as she always used to go back to her past. But..now..that blog is almost dead by now. Last post was made in 2011. She had a baby and think got really carried away by it. Anyways, sure she will have no clue that there is this woman here, who still cherish her deeply as a very close co-blogger. We both are from Kerala and have never ever met..yet..we were good virtual friends. Will give the link to it at the end of this post..and now..let me get back to where i was)

So,

What's that i very closely stick on to?

1. Rice.

But...which one? there's way too many, out there.


 Well..the writer's choice AWARD goes to the one on the left. The longer ones. The more longer..the more preferred it is.
 
Cooking the rice : You do it two ways. Either, cook the soaked basmati rice in large quantity of water with some spices and when almost done, you drain off the excess water. Well..thats how even most professional cooks do..but for me...well..I DON'T.

I personally prefer to cook the rice in slight less than double the quantity of rice to water and let the rice drink up all of the liquid till done. There is no strainig off the water in here. That is, if taking 5 cups of rice, i then go for not 10, but 9 cups of boiled water.

 
.....you necessarily don't have to do that !!!

*  In a heavy bottom pan, add some FAT (ghee/butter), slightly roast the required spices - cinamon, cardamom, cloves, pepper, cumins, bayleaves, star anise.
*  Now add the soaked and drained rice and slightly fry in the same FAT, and then add in boiled water in proportion as mentioned.
*  Do not miss out on salt at this stage, else the rice goes real bland and some lime-juice too to keep the rice from sticking to each other.
* Once cooked, keeping the flame real low and the rice cooking bowl uncovered half way through, now let the rice to cool thoroughly. I do this by spreading the rice in thin layer on large flat plates or trays. This will help the rice grains to separate and note...cooked basmathi rice is to be HANDLED WITH CARE !. Do not showel it around. Use a fork, and only the fork.


Colouring the sketch..(read it as rice). Take a small quantity of the cooled rice in two separate bowls.
Add saffron to one for the yellow colour. You can also use yellow food colour if the former is not available.

To the second bowl, add few drops of red food colour (even lesser portion of rice than the yellow) - you just need a touch of red here and there for the "attraction"factor.

2. Chicken


Cook the chicken as per the recipe (shared at the end of this post) but THE NEVER MISS STEP.
Soak about 10-15 cashewnuts in hot water for a few minutes and then grind it thoroughly, with yougurt. Other recipes asks for almonds, poppy seeds etc to be ground....upto you, but I just stick to this. This  sauce does make the curry rich, creamy and brings in the right consistency.
 
3.  Get ready with the miscellaneous items:
*  Raisins and cashewnuts fried in ghee
*  Fried onions
*  Coriander and mint leaves (just  a few) - cut small.
*  Pineapple cut to small pieces
*  Rose water
* Pineapple essence
* Melted ghee or butter
 
the garnishing's
 
4. Layering the Biriyani
 
 
Bring together all at one place - the rice, chicken and all those in item 3 above. I usually go for such disposable deep aluminum trays......

 
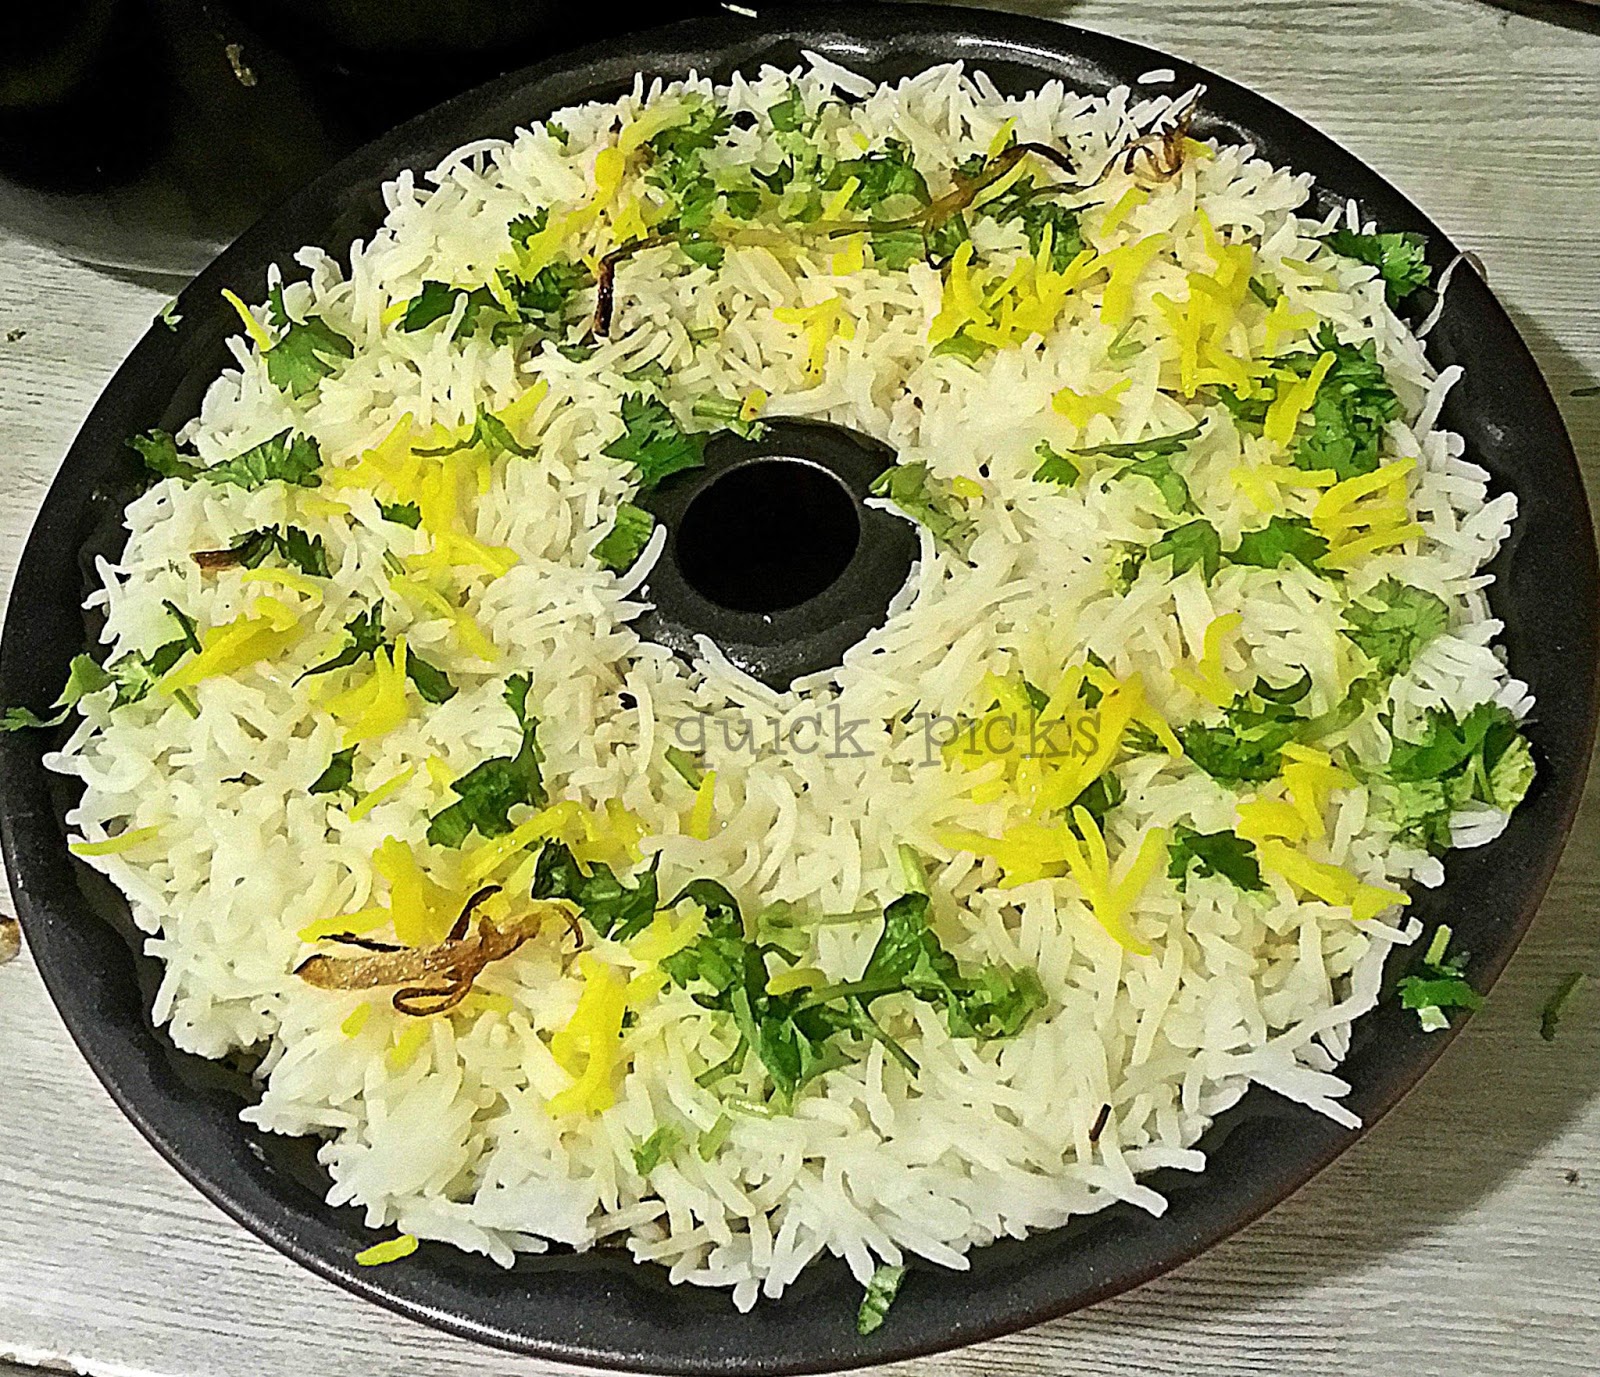
..... but this time, for  a change, tried using a bundt cake bowl !

Greese the sides of the bowl using melted butter or ghee.
Add in few of the fried onions, cashewnuts and raisins.


Fill it less than halfway with the rice. And its optional for you to add small pieces of pineapples. .if you like. I ....personally, very much.....like to have it in there. Most biriyani recipes do not call for pineapples, but in certain parts of our state, kerala...they do use it.


Top it with coloured rice (the yellow and red), roasted garnishing items, coriander and mint leaves, few drops of rose water and pineapple essence. (this essence stuff is my next personal addition ) I am still in search for THAT lovely aroma ..but...yet to have something to be content with. Till then, this essence will do.


Now, this is the consistency that is am speaking about. Another "never miss" while making biriyani.
The gravey should neither be too loose, nor too thick. Just right enough to coat the chicken pieces and of course, the rice that covers the pieces. We call that the "masala rice". It has the best flavours, being in close proximity to the meat while getting dummed.

Secondly, keep the salt content of the chicken to the higher side. It should be extra salty. Do not worry, getting mixed with the rice, it gets balanced out.


Fill the bowl again with the rice - plain and coloured, the garnishings, essence, rose water.
Add in little bit of melted butter or ghee in between the layers.
 
An now..it time for

aabra-kababra.....hokus-pokus......gili gili gili....
 
I believe, the best part of making biriyani is the transformation that happens once it moves into the oven. Got no clue what goes on in there...but, it definitely taste way different after its baked.
 
 Cover tightly the set bowl with aluminium foil..and move it into the.....


Preheat the oven to well..again...i will be honest..i don't keep any set temperature. I start of preheating at 150 deg C..later half way through reduce to 120, and again slightly less;further down the lane. But, it stays in there definitely not less than one and a half hours.
  
In the above picture of the layered rice..you see..its just plain...that's how it goes into the MAGIC OVEN. But, once out...


its bright and colourful !
 
Doing this in the bundt cake bowl, I had just one layer of the chicken. But with the deeper foil tray...we can go in for 2 layers and the same steps repeated.


Garnish with few more coriander leaf cuts to bring in the contrast ..yellow, reds and greens.

Clicked, straight from the oven...just before it got served to the guests.
And now..for the worst part of making this .
 
Well..its just a hit yeah miss. You definitely can't be doing any test-tasting before the guests do. With the above setting done in the bundt style, you do invert it onto the serving plate. But, done in the foil tray..it goes  exactly like that, straight from the oven to the dining table, unopened. The best part is opening it when all are around the table and the aroma goes stright into their nostrils.  The expression on their faces are the only way to determine if its fine, yeah.. flop.


Till now, i have had just one "flop-show" doing this, and that was when, I had purchased the meat myself (mutton) unlike all other times, it would be my husband doing it. And here, we just have to be really cautious especially with mutton, coz there are too many breeds from various countries and some can stink really bad! We have to strictly stick to fresh indian mutton here. And that day..well..i saw this "Newzealand" brand  and was like..its the Kiwi's..should be better than Indian(yeah! it was too folish of me). And God! it stinked like hell once cooked. I was definitely unpleased with the outcome. That's what happens if you consider your home products inferior to the outsiders :(. A lesson learnt.
 
Phew !! one big post !!!
and before I sign off...
this is the link with the detailed writeup on making biriyani from scratch...the rice and the chicken recipe in here.
 
 
I deeply wish, she gets back to blogging.
 
And again..you are most welcome to use any recipe that suits you. There are scores, in the net. Give a search in google, and..that's what you see.
 
 
Cheers... !


Friday, June 1, 2012

3 in 1 post : The Red Pulav, done the pressure cooker way with a quick side starter and spicy Pepper Chicken

Am I not really greateful to a dear friend of ours, a great cook by herself, who shared this great tip in making pulav in the pressure cooker. Its really easy, time saving, and the rice...they come out really well. Trust me!

Here, I have got the "beetroot & carrot pulav" which is by itself loaded with all the goodness of the veggies and has a great colour too. So moms, if your kids are not much into eating vegetables, get them this rice meal and sure, they will like it.

A quick starter pick, with baby tomatoes and cucumber..and...hot hot kerala style pepper chicken.


The Red Rice Pulav

You need :

Carrot - 1 big, grated
Beetroot - 1 big, grated
Spices (cloves, cumin, peppercones, bay leaves, cardamom) - few
Onion - 1 medium sized, cut small
Garlic - 3 , sliced small
Basmati rice - 3 cups, soaked in water for atleast an hour.
"BOILED" Water - 1.5 cups for each cup of rice


How to :

Add 2 tbs of olive oil in the pressure cooker and saute the garlic, onions and the spices.
Add the grated beets and carrot and cook till tender.
In the meanwhile, boil the required quanitity of water (here, 3*1.5 cups) and pour the "boiled water" into the pressure cooker once the veggies are done.
Now add in the rice, salt and a spoon of butter/margarine.
Close the pressure cooker and once the steam starts to pass through the nossle in a full straight path, put on the whistle and close the cooker.

Now this is the key - Adding in the rice to hot boiled water ..and....putting down the whistle while steam passes straight up. Let the cooker stay on the stove, (turned off) for about 30 minutes. The pulav will be done by then.

 It has a great colour, is healthy and tastes great too. You can do it with just carrot or beetroot alone. The carrot rice will be more orangish in shade and the one with beetroot alone gives a lovely purple colour. Sure the kids are gonna love it.


..and for the sides....there's this very quick tomato n cucumber starter picks and spicy pepper chicken done the kerala style.

Baby Tomato & Cucumber Picks with Chillie-Barbaque sauce dip


You need:
Baby tomatoes - red and yellow coloured ones - 6 each
Small sized cucumber - 2
Tooth picks

For the sauce - you need -
Barbaque sauce - 3 tbsp
Hot and sweet chillie sauce - 2 tbsp
Dried rosemary
Paprika powder - a pinch

Mint leaves - to decorate


How to

Cut the baby tomatoes into half.
Cut the cucumber crosswise about 1 cm thick and insert a slice in between the cut tomato as shown.
Join together using a toothpick.
Decorate with a mint leaf .

For the sauce, just mix all the ingredients together, and serve aside the tomato picks.

A quick starter in just a minute.


want something really hot and spicy ??
The kerala style pepper chicken really makes up for the mild and suttle flavour of the red Rice pulav.

You need:
Chicken, cut to medium size pieces - 2 kg

To marinate
4 to 5 tsp - Pepper chicken masala (available in Indian supermarkets)
Ginger garlic paste - 1 tbsp
Salt to taste

Other ingredients
Onions , chopped - 3 cups
Pepper chicken masala - 3 tbsp
Chille powder, Coriander powder - 2-3 tsp
Turmeric powder - 1 tsp
Black pepper powder - 1-2 tbsp
Green chilies, chopped - 4-5
Ginger - 1 inch piece
Garlic - 6-7 cloves
4 to 5 sprigs - Curry leaves
How to prepare Kerala Pepper chicken

Marinate chicken for 30 mins in a marinade made with mixing the said ingredients with little water ,ensure that chicken pieces get well covered in all sides with the marinade mixture.

How to :

Heat a pan & put marinated chicken into the pan ,no need to add water ,close with a lide & cook ,as chicken will leave water it will get cooked in that water ,cook till chicken turns tender ,drain the water from the cooked chicken & keep aside the chicken pieces .

Take another pan & heat oil.
When the oil is hot add in mustard seeds, ginger, garlic, green chillie, and chopped onions.
Fry till it turn brown, add the masalas and stir on low flame till the raw smells leaves and oil separates.
Now add the cooked chicken pieces , pepper powder and  mix well with the masala . Once the gravy is well blended,
Remove from heat & off the stove .
Garnish this black pepper chicken with coriander leaves.


Enjoy  !!!

Tuesday, January 3, 2012

Oven baked Chicken & Majbooz


You need:

Chicken - (I have used 3 mini chicken here)
Whole spices - cloves, cardamom, pepper, cumin, bay leaves
Turmeric powder and Chicken Masala (any brand)
Tomato paste
Barbaque sauce and
Salt to taste

How to:

Place the cleaned chicken (do not remove the skin) in a pan filled with water and add the spices along with a table spoon of chicken masala and boil till the chicken is thoroughly cooked.


Drain the chicken , but retain the broth.


Mix together about 1 and a 1/2 tsp of chicken masala, 2 tsp tomato paste, 2 tsp barbaque sauce, salt and pepper to form the coating mix.


Apply generously over the chicken , inside out. Now thats my loyal assistant, ever ready to help Mommy in her kitchen.


Preheat oven to 200 deg C, and bake till the outside is golden brown, for about 25 minutes or so, depending on the size of the chicken. Mine did get a bit too charred..
but, you are not gonna eat the skin anyways...(excuses..i know...)

And with the chicken broth, drain off the spices and measure the amount. Say, if you've got 4 cups of broth, then add in half the quantity, 2 cups, that is.. of washed and soaked basmati rice and cook the rice in the broth. A lovely but very mild flavoured rice is ready just in a couple of minutes. 

A typical arabic meal....Chicken Majbooz...


..and now..for the photo shoot...


:)

Liked this post ? Then, do "like" my facebook page "The Pick'y Bank" to keep updated on more interesting recipes.

Monday, October 29, 2007

Rice sticks (served upside down??) and weekend in the sea...

Rice - Sticks ....it was the first time I was trying this out, and the first question that came to my mind seeing the perfectly white colour of the cooked sticks was....."Oh, my have these sticks been bleeched or tossed in Ujala (the common brand of Super-white, fabric whitener.... available in India) . The colour was way too bright!
.
Cooked the sticks in water, adding salt and for an Indian touch, added cumin seeds too..it did give a distinct flavour and taste to the sticks, believe me ....
.
Usually, pasta's are served with the toppings on top....but what if you start thinking the other way round ???
.

.
Large serving of veggies below, and the noodle on top .... life is boring without variety, u agree...???

UPDATE : This image goes straight to the Click Event by Bee with this month's theme being noodles.
.
My ever handy veg-mix :
.

This particluar veg mix of mine, has been a great time saver for me, and the best, last weekend.

All those on the right is sauted in oil, with ginger, garlic, soya sauce(the thicker variety, lest the mix gets soggy after a while) , tomato sauce, chillie sauce, dashed with salt, pinch of sugar and pepper . Thats all its about.

But, its applications are really various.

Mix it with cooked basmathi rice, u have your instant fried-rice

Mix with Noodles...ur mixed noodles..(addition of non is at your discretion)

Stuff inside a bun, make a sandwich....go on, and play with your own ideas ....

Each time i prepare my veg mix, I usually make it in large quantity, and go with any other variation the next day......and wasn't I really glad that I did !!!

The noodles was had for Thursday dinner. Fridays, Santho goes to play cricket in the mornings (God alone know what time he leaves...I will be way too asleep to keep track)
.
And on his way back, he gave me call and said "Sona we are going to beach today..get ready, Sandeep and family will be there too !!!)
.
I was like ..."Oh my God, what do I prepare ???..going to the beach without my contribution of food is the least think I can think off. Rest was all ?><)*^$##@@%)@#%%.


Arabic Sandwich:

Took Kuboos bread, applied a layer of light-mayo, layered the mix, topped with chopped chicken meat slightly fried in oil, with pepper and salt (boneless chicken meat is also an ever present thingy in my freezer... u never know when, what comes in hand!) . Top it with ketchup, roll over and in a foil. Khallaasss .


Fresh Salad

Thankfully, had my maid this weekend so off she was with the chopping of the veggies for the salad plate.
.

Well done Anita, u did a good job, and quite fast too !!!
.


.

Potato Wedge :

.Chopped as shown without removing the skin, dashed some salt, pepper and chillie powder onto it..straight to the MW till tender, and deep fried.


Shrimp Curry:
.
Sorry, I dont have a good snap of it, just managed a closeup, as and way it was packed hot in the casserol.
.
U find a really class recipie and snap of shrimps here, by dear Mishmash. I didnt have the time to wait that long to get the roasted effect, neither coconut chunks.


...and finally, this was my contibution to our this weekend beach-day out.
Marinated fish, and Kappa (Mallu's all time fav...sponsored by Anu...Sandeep's better half)

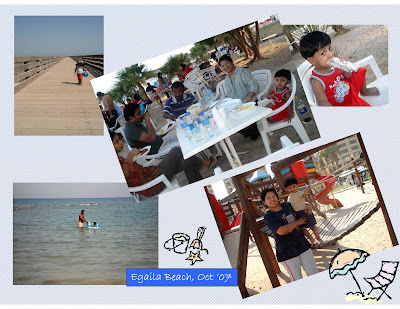
Thought I would share some of our personal moments with my co-bloggers....

This one is from our last weekend break with family n friends....


Below is one such, during last month, also with Sandeep, Anu and our cousin Ajo..not to forget our littleman Shayne !
.

The one below was a couple of month back, after we relocating our flat to this place called Mahboula, which gives us the greatest luxury of a peaceful beach just at walkng distance, and a sea view from our balcony!.. So every friday morning, is learning time...for me..Swimming !!!..Now, trust me, late 20's is not that late to start to learn..better late than never. Myself and my 2 and a half year old Shayne are learning swimming together...and Eureka!!..last week I floated by myself !!...yuppieeee!!!
.
Showing posts with label Rice. Show all posts

Wednesday, September 10, 2014

Pachoru - a Keralite Christian offering

For Catholic Christians, September 8 marks the Feast of Mother Mary, or Nativity of Mother Mary, believed to be Her birthday. 
 
 
The winegrowers in France called this feast "Our Lady of the Grape Harvest". The best grapes are brought to the local church to be blessed and then some bunches are attached to hands of the statue of Mary. A festive meal which includes the new grapes is part of this day.
 
In Kerala, meanwhile, most churches would give "THIS" as an offering to the devoties , after the Church Service. Traditionally, known as "pachoru" in Malayalam it's raw rice cooked in coconut milk and served with jaggery syrup.


Ingredients

Raw rice - 1 and 1/2 cup

Thick coconut milk - 1/2 - 1 cup

Thin coconut milk - 5 cup

Cumin seeds - 1/2 tsp

Salt as needed

Jaggery as needed
 
Preparation
 
Pressure cook raw rice along with 5 cups of thin coconut milk, salt and cumin seeds till 2 whistles.

When the pressure is released, add thick coconut milk to the cooked rice. Boil it. Switch off the stove.

Grease a plate and pour the cooked
rice to this and flatten it, keep it for sometime, so that you can cut it into the desired shapes.
 
Pachoru is ready to be served with jaggery syrup .
 
How to prepare jaggery syrup

Boil jaggery with some water on low flame till it melts completely to forms the syrup. Cool and strain before using.


Now, hope over to my Pick Quicks blog if you would  like to have a peep into OUR Parish Church Feast back home in Kerala, The Thykoodam St. Raphael's Churuch, and not to miss, the best of the most " in"music band at the moment..."The Thaikoodam Bridge".
 
 
The link "here"


Recipe source - a dear co-blogger friend Beena . Here blog in the link here


Wednesday, June 12, 2013

The mast mast DUM...for biriyanis.

We had been having guests come over during the last few weekends in a row now..and ask my husband about the menu, he is like..." biriyani and the brinjal chuntey (that will come sometime later).....stays. Rest, up to you." Coz, this was something that his wifey gets really appreciated for.
.
 

Well, yes...think i can do this right, by now. Have been making this "well appreciated" biriyani for years..but....have never made an attempt to write about it on my blog. Not that i keep secrets and don't want to reveal any hidden ingredients ..no...nothing like that. Trust me, to all honestly, its just that.. i don't have any standard recipe. Sachee ! I just go by the instincts. Yet..yet..yes, there are certain "never miss" steps that i very strictly adhear to. And that, is definitely getting shared here.

 
(By the way, for a person who is very new to this really flavourful,  Indian one pot meal called "The Biriyani", this post will be very incomplete. I am not going in for the detailed cooking and recipe in here...coz, as I said, i don't stick to one ..neither do i use any standard masala powder (whatever is available at that moment, goes in)..but don't you worry. I can always refer you to this particular blog site which i really really liked, during my first attempt in food blogging, about 5 years back. She was a very active blogger then. Her writeups were very detailed, i enjoyed reading her posts as she always used to go back to her past. But..now..that blog is almost dead by now. Last post was made in 2011. She had a baby and think got really carried away by it. Anyways, sure she will have no clue that there is this woman here, who still cherish her deeply as a very close co-blogger. We both are from Kerala and have never ever met..yet..we were good virtual friends. Will give the link to it at the end of this post..and now..let me get back to where i was)

So,

What's that i very closely stick on to?

1. Rice.

But...which one? there's way too many, out there.


 Well..the writer's choice AWARD goes to the one on the left. The longer ones. The more longer..the more preferred it is.
 
Cooking the rice : You do it two ways. Either, cook the soaked basmati rice in large quantity of water with some spices and when almost done, you drain off the excess water. Well..thats how even most professional cooks do..but for me...well..I DON'T.

I personally prefer to cook the rice in slight less than double the quantity of rice to water and let the rice drink up all of the liquid till done. There is no strainig off the water in here. That is, if taking 5 cups of rice, i then go for not 10, but 9 cups of boiled water.

 
.....you necessarily don't have to do that !!!

*  In a heavy bottom pan, add some FAT (ghee/butter), slightly roast the required spices - cinamon, cardamom, cloves, pepper, cumins, bayleaves, star anise.
*  Now add the soaked and drained rice and slightly fry in the same FAT, and then add in boiled water in proportion as mentioned.
*  Do not miss out on salt at this stage, else the rice goes real bland and some lime-juice too to keep the rice from sticking to each other.
* Once cooked, keeping the flame real low and the rice cooking bowl uncovered half way through, now let the rice to cool thoroughly. I do this by spreading the rice in thin layer on large flat plates or trays. This will help the rice grains to separate and note...cooked basmathi rice is to be HANDLED WITH CARE !. Do not showel it around. Use a fork, and only the fork.


Colouring the sketch..(read it as rice). Take a small quantity of the cooled rice in two separate bowls.
Add saffron to one for the yellow colour. You can also use yellow food colour if the former is not available.

To the second bowl, add few drops of red food colour (even lesser portion of rice than the yellow) - you just need a touch of red here and there for the "attraction"factor.

2. Chicken


Cook the chicken as per the recipe (shared at the end of this post) but THE NEVER MISS STEP.
Soak about 10-15 cashewnuts in hot water for a few minutes and then grind it thoroughly, with yougurt. Other recipes asks for almonds, poppy seeds etc to be ground....upto you, but I just stick to this. This  sauce does make the curry rich, creamy and brings in the right consistency.
 
3.  Get ready with the miscellaneous items:
*  Raisins and cashewnuts fried in ghee
*  Fried onions
*  Coriander and mint leaves (just  a few) - cut small.
*  Pineapple cut to small pieces
*  Rose water
* Pineapple essence
* Melted ghee or butter
 
the garnishing's
 
4. Layering the Biriyani
 
 
Bring together all at one place - the rice, chicken and all those in item 3 above. I usually go for such disposable deep aluminum trays......

 
..... but this time, for  a change, tried using a bundt cake bowl !

Greese the sides of the bowl using melted butter or ghee.
Add in few of the fried onions, cashewnuts and raisins.


Fill it less than halfway with the rice. And its optional for you to add small pieces of pineapples. .if you like. I ....personally, very much.....like to have it in there. Most biriyani recipes do not call for pineapples, but in certain parts of our state, kerala...they do use it.


Top it with coloured rice (the yellow and red), roasted garnishing items, coriander and mint leaves, few drops of rose water and pineapple essence. (this essence stuff is my next personal addition ) I am still in search for THAT lovely aroma ..but...yet to have something to be content with. Till then, this essence will do.


Now, this is the consistency that is am speaking about. Another "never miss" while making biriyani.
The gravey should neither be too loose, nor too thick. Just right enough to coat the chicken pieces and of course, the rice that covers the pieces. We call that the "masala rice". It has the best flavours, being in close proximity to the meat while getting dummed.

Secondly, keep the salt content of the chicken to the higher side. It should be extra salty. Do not worry, getting mixed with the rice, it gets balanced out.


Fill the bowl again with the rice - plain and coloured, the garnishings, essence, rose water.
Add in little bit of melted butter or ghee in between the layers.
 
An now..it time for

aabra-kababra.....hokus-pokus......gili gili gili....
 
I believe, the best part of making biriyani is the transformation that happens once it moves into the oven. Got no clue what goes on in there...but, it definitely taste way different after its baked.
 
 Cover tightly the set bowl with aluminium foil..and move it into the.....


Preheat the oven to well..again...i will be honest..i don't keep any set temperature. I start of preheating at 150 deg C..later half way through reduce to 120, and again slightly less;further down the lane. But, it stays in there definitely not less than one and a half hours.
  
In the above picture of the layered rice..you see..its just plain...that's how it goes into the MAGIC OVEN. But, once out...


its bright and colourful !
 
Doing this in the bundt cake bowl, I had just one layer of the chicken. But with the deeper foil tray...we can go in for 2 layers and the same steps repeated.


Garnish with few more coriander leaf cuts to bring in the contrast ..yellow, reds and greens.

Clicked, straight from the oven...just before it got served to the guests.
And now..for the worst part of making this .
 
Well..its just a hit yeah miss. You definitely can't be doing any test-tasting before the guests do. With the above setting done in the bundt style, you do invert it onto the serving plate. But, done in the foil tray..it goes  exactly like that, straight from the oven to the dining table, unopened. The best part is opening it when all are around the table and the aroma goes stright into their nostrils.  The expression on their faces are the only way to determine if its fine, yeah.. flop.


Till now, i have had just one "flop-show" doing this, and that was when, I had purchased the meat myself (mutton) unlike all other times, it would be my husband doing it. And here, we just have to be really cautious especially with mutton, coz there are too many breeds from various countries and some can stink really bad! We have to strictly stick to fresh indian mutton here. And that day..well..i saw this "Newzealand" brand  and was like..its the Kiwi's..should be better than Indian(yeah! it was too folish of me). And God! it stinked like hell once cooked. I was definitely unpleased with the outcome. That's what happens if you consider your home products inferior to the outsiders :(. A lesson learnt.
 
Phew !! one big post !!!
and before I sign off...
this is the link with the detailed writeup on making biriyani from scratch...the rice and the chicken recipe in here.
 
 
I deeply wish, she gets back to blogging.
 
And again..you are most welcome to use any recipe that suits you. There are scores, in the net. Give a search in google, and..that's what you see.
 
 
Cheers... !


Friday, June 1, 2012

3 in 1 post : The Red Pulav, done the pressure cooker way with a quick side starter and spicy Pepper Chicken

Am I not really greateful to a dear friend of ours, a great cook by herself, who shared this great tip in making pulav in the pressure cooker. Its really easy, time saving, and the rice...they come out really well. Trust me!

Here, I have got the "beetroot & carrot pulav" which is by itself loaded with all the goodness of the veggies and has a great colour too. So moms, if your kids are not much into eating vegetables, get them this rice meal and sure, they will like it.

A quick starter pick, with baby tomatoes and cucumber..and...hot hot kerala style pepper chicken.


The Red Rice Pulav

You need :

Carrot - 1 big, grated
Beetroot - 1 big, grated
Spices (cloves, cumin, peppercones, bay leaves, cardamom) - few
Onion - 1 medium sized, cut small
Garlic - 3 , sliced small
Basmati rice - 3 cups, soaked in water for atleast an hour.
"BOILED" Water - 1.5 cups for each cup of rice


How to :

Add 2 tbs of olive oil in the pressure cooker and saute the garlic, onions and the spices.
Add the grated beets and carrot and cook till tender.
In the meanwhile, boil the required quanitity of water (here, 3*1.5 cups) and pour the "boiled water" into the pressure cooker once the veggies are done.
Now add in the rice, salt and a spoon of butter/margarine.
Close the pressure cooker and once the steam starts to pass through the nossle in a full straight path, put on the whistle and close the cooker.

Now this is the key - Adding in the rice to hot boiled water ..and....putting down the whistle while steam passes straight up. Let the cooker stay on the stove, (turned off) for about 30 minutes. The pulav will be done by then.

 It has a great colour, is healthy and tastes great too. You can do it with just carrot or beetroot alone. The carrot rice will be more orangish in shade and the one with beetroot alone gives a lovely purple colour. Sure the kids are gonna love it.


..and for the sides....there's this very quick tomato n cucumber starter picks and spicy pepper chicken done the kerala style.

Baby Tomato & Cucumber Picks with Chillie-Barbaque sauce dip


You need:
Baby tomatoes - red and yellow coloured ones - 6 each
Small sized cucumber - 2
Tooth picks

For the sauce - you need -
Barbaque sauce - 3 tbsp
Hot and sweet chillie sauce - 2 tbsp
Dried rosemary
Paprika powder - a pinch

Mint leaves - to decorate


How to

Cut the baby tomatoes into half.
Cut the cucumber crosswise about 1 cm thick and insert a slice in between the cut tomato as shown.
Join together using a toothpick.
Decorate with a mint leaf .

For the sauce, just mix all the ingredients together, and serve aside the tomato picks.

A quick starter in just a minute.


want something really hot and spicy ??
The kerala style pepper chicken really makes up for the mild and suttle flavour of the red Rice pulav.

You need:
Chicken, cut to medium size pieces - 2 kg

To marinate
4 to 5 tsp - Pepper chicken masala (available in Indian supermarkets)
Ginger garlic paste - 1 tbsp
Salt to taste

Other ingredients
Onions , chopped - 3 cups
Pepper chicken masala - 3 tbsp
Chille powder, Coriander powder - 2-3 tsp
Turmeric powder - 1 tsp
Black pepper powder - 1-2 tbsp
Green chilies, chopped - 4-5
Ginger - 1 inch piece
Garlic - 6-7 cloves
4 to 5 sprigs - Curry leaves
How to prepare Kerala Pepper chicken

Marinate chicken for 30 mins in a marinade made with mixing the said ingredients with little water ,ensure that chicken pieces get well covered in all sides with the marinade mixture.

How to :

Heat a pan & put marinated chicken into the pan ,no need to add water ,close with a lide & cook ,as chicken will leave water it will get cooked in that water ,cook till chicken turns tender ,drain the water from the cooked chicken & keep aside the chicken pieces .

Take another pan & heat oil.
When the oil is hot add in mustard seeds, ginger, garlic, green chillie, and chopped onions.
Fry till it turn brown, add the masalas and stir on low flame till the raw smells leaves and oil separates.
Now add the cooked chicken pieces , pepper powder and  mix well with the masala . Once the gravy is well blended,
Remove from heat & off the stove .
Garnish this black pepper chicken with coriander leaves.


Enjoy  !!!

Tuesday, January 3, 2012

Oven baked Chicken & Majbooz


You need:

Chicken - (I have used 3 mini chicken here)
Whole spices - cloves, cardamom, pepper, cumin, bay leaves
Turmeric powder and Chicken Masala (any brand)
Tomato paste
Barbaque sauce and
Salt to taste

How to:

Place the cleaned chicken (do not remove the skin) in a pan filled with water and add the spices along with a table spoon of chicken masala and boil till the chicken is thoroughly cooked.


Drain the chicken , but retain the broth.


Mix together about 1 and a 1/2 tsp of chicken masala, 2 tsp tomato paste, 2 tsp barbaque sauce, salt and pepper to form the coating mix.


Apply generously over the chicken , inside out. Now thats my loyal assistant, ever ready to help Mommy in her kitchen.


Preheat oven to 200 deg C, and bake till the outside is golden brown, for about 25 minutes or so, depending on the size of the chicken. Mine did get a bit too charred..
but, you are not gonna eat the skin anyways...(excuses..i know...)

And with the chicken broth, drain off the spices and measure the amount. Say, if you've got 4 cups of broth, then add in half the quantity, 2 cups, that is.. of washed and soaked basmati rice and cook the rice in the broth. A lovely but very mild flavoured rice is ready just in a couple of minutes. 

A typical arabic meal....Chicken Majbooz...


..and now..for the photo shoot...


:)

Liked this post ? Then, do "like" my facebook page "The Pick'y Bank" to keep updated on more interesting recipes.

Monday, October 29, 2007

Rice sticks (served upside down??) and weekend in the sea...

Rice - Sticks ....it was the first time I was trying this out, and the first question that came to my mind seeing the perfectly white colour of the cooked sticks was....."Oh, my have these sticks been bleeched or tossed in Ujala (the common brand of Super-white, fabric whitener.... available in India) . The colour was way too bright!
.
Cooked the sticks in water, adding salt and for an Indian touch, added cumin seeds too..it did give a distinct flavour and taste to the sticks, believe me ....
.
Usually, pasta's are served with the toppings on top....but what if you start thinking the other way round ???
.

.
Large serving of veggies below, and the noodle on top .... life is boring without variety, u agree...???

UPDATE : This image goes straight to the Click Event by Bee with this month's theme being noodles.
.
My ever handy veg-mix :
.

This particluar veg mix of mine, has been a great time saver for me, and the best, last weekend.

All those on the right is sauted in oil, with ginger, garlic, soya sauce(the thicker variety, lest the mix gets soggy after a while) , tomato sauce, chillie sauce, dashed with salt, pinch of sugar and pepper . Thats all its about.

But, its applications are really various.

Mix it with cooked basmathi rice, u have your instant fried-rice

Mix with Noodles...ur mixed noodles..(addition of non is at your discretion)

Stuff inside a bun, make a sandwich....go on, and play with your own ideas ....

Each time i prepare my veg mix, I usually make it in large quantity, and go with any other variation the next day......and wasn't I really glad that I did !!!

The noodles was had for Thursday dinner. Fridays, Santho goes to play cricket in the mornings (God alone know what time he leaves...I will be way too asleep to keep track)
.
And on his way back, he gave me call and said "Sona we are going to beach today..get ready, Sandeep and family will be there too !!!)
.
I was like ..."Oh my God, what do I prepare ???..going to the beach without my contribution of food is the least think I can think off. Rest was all ?><)*^$##@@%)@#%%.


Arabic Sandwich:

Took Kuboos bread, applied a layer of light-mayo, layered the mix, topped with chopped chicken meat slightly fried in oil, with pepper and salt (boneless chicken meat is also an ever present thingy in my freezer... u never know when, what comes in hand!) . Top it with ketchup, roll over and in a foil. Khallaasss .


Fresh Salad

Thankfully, had my maid this weekend so off she was with the chopping of the veggies for the salad plate.
.

Well done Anita, u did a good job, and quite fast too !!!
.


.

Potato Wedge :

.Chopped as shown without removing the skin, dashed some salt, pepper and chillie powder onto it..straight to the MW till tender, and deep fried.


Shrimp Curry:
.
Sorry, I dont have a good snap of it, just managed a closeup, as and way it was packed hot in the casserol.
.
U find a really class recipie and snap of shrimps here, by dear Mishmash. I didnt have the time to wait that long to get the roasted effect, neither coconut chunks.


...and finally, this was my contibution to our this weekend beach-day out.
Marinated fish, and Kappa (Mallu's all time fav...sponsored by Anu...Sandeep's better half)

Thought I would share some of our personal moments with my co-bloggers....

This one is from our last weekend break with family n friends....


Below is one such, during last month, also with Sandeep, Anu and our cousin Ajo..not to forget our littleman Shayne !
.

The one below was a couple of month back, after we relocating our flat to this place called Mahboula, which gives us the greatest luxury of a peaceful beach just at walkng distance, and a sea view from our balcony!.. So every friday morning, is learning time...for me..Swimming !!!..Now, trust me, late 20's is not that late to start to learn..better late than never. Myself and my 2 and a half year old Shayne are learning swimming together...and Eureka!!..last week I floated by myself !!...yuppieeee!!!
.